Manual ID checking process
3. Entering the ID Documents (manual process)
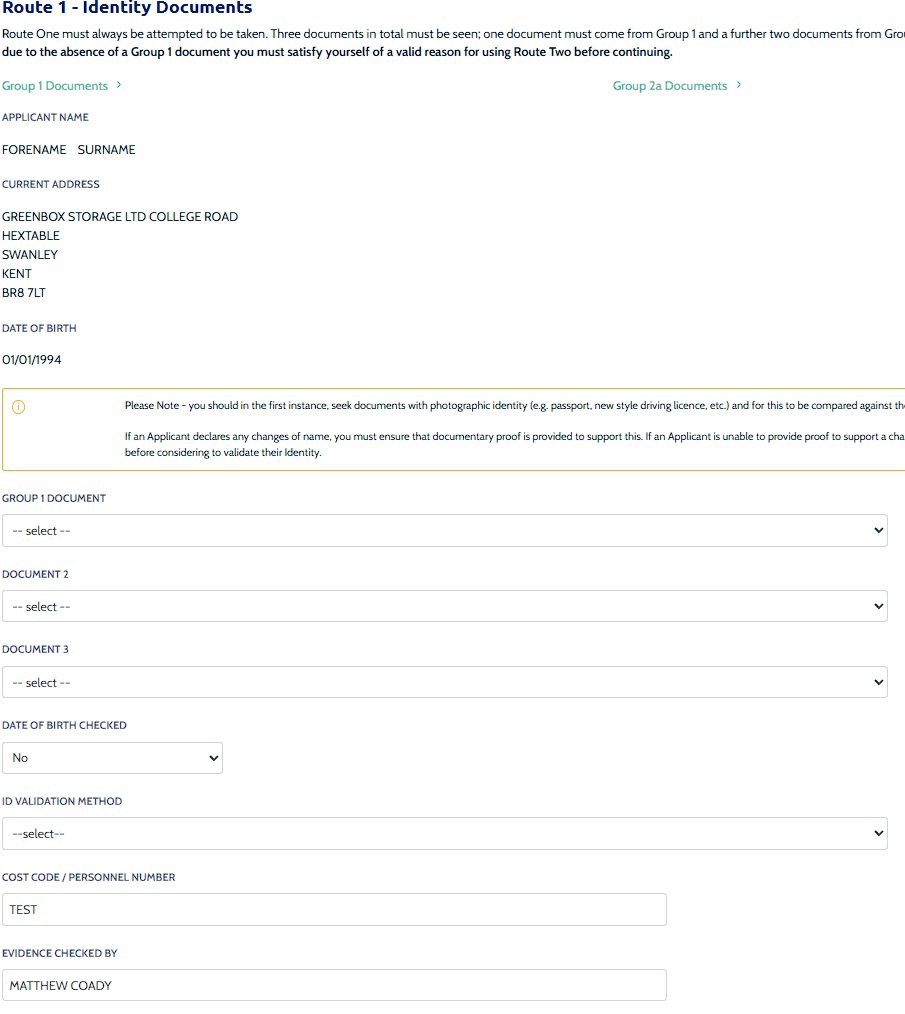
Click on Complete ID check or Check ID. This will take you to the Identity Documents screen.

Select Complete the ID check manually using original documents provided by the applicant.

Guidance around which documents can be accepted from each group can be viewed by clicking Group 1 Documents, Group 2a Documents or Group 2b Documents can be viewed at https://thirtyoneeight.org/help-and-resources/ebulk-recruiter-resources/dbs-id-checking-requirements/
If an applicant does not hold sufficient ID to be able to go through Route 1, you will need to click the Unable to verify ID via Route 1 – proceed to Route 2 button at the bottom of the screen.
- Select the documents the applicant has provided for you from the drop-down boxes to confirm to us that they match the details provided on the online application form.
- Complete the 'date of birth checked' drop down boxes to confirm that you have verifeid any documents containing the date of birth match the online application form
- Select which 'ID Validation Method' was used to complete the ID check.
-
- Option one - Face to face Id check done in person checking the document in the presence of the individual.
- Option two - conduct the ID check via video link – for Zoom In these circumstances the Recruiter must be in possession of the physical documents.
- Option three - ID check can be completed via video link – for example Zoom, without having them in person however the documents must be presented to the Recruiter on the first day of employment or volunteering.
- If you require a Cost Code or Personnel Number to be assigned to the specific application, this can be entered in the Cost Code / Personnel Number field - only usually needed for large organisations with different departments.
Click Save then click the Return to Application icon in the green box located at the top of the screen.
Additional Recruiter (if an ID Checker only): your part of the process is now complete. The application will disappear for you but is still awaiting action from the Lead Recruiter.
Lead Recruiter or Additional Recruiter with full access: you are ready to complete Section Y of the form (Enhanced Disclosures only) or for a Basic Disclosures only please now click on the approve button to transmit the form to the DBS.
Disclosure External ID validation check (Route Two enhanced applications only)
Part of the ID checking process for Route Two requires an External ID validation check in addition to the forms of identification that are witnessed. An external ID validation check is a way of verifying the identity of an applicant.
The result of the External ID validation check must be stated on the ID screen before the application can be approved. The result of the External ID validation check will simply be a PASS or FAIL. Dependent on the result of the external ID validation check, you will then either authenticate the applicant or consider moving to Route Three.
If the result of the External ID validation check is PASS, then this must be selected from the drop-down box on the identification screen. Once PASS is selected, this will open up two more fields that can be completed, one for Validation Notes of the External ID validation check result and one for an External Reference if a reference number is provided with the result.

Click Save to complete the identification verification process.
If the result of the External ID validation check is FAIL, then this must be selected from the drop-down box on the identification screen. Once FAIL is selected, a pop-up box will appear advising you that you may now consider proceeding to Route Three. To do this click the Proceed to Route 3 button in the bottom left hand corner of the pop up box.
If you are unable to proceed to Route Three, the applicant will be required to complete a paper application and give consent to have their fingerprints taken. If this is the case, you must click the OK – fingerprints required button in the bottom right-hand corner of the pop-up box. The application will then be archived from the system.
If the applicant cannot meet the requirements of Route One and Two, you should have had a probing discussion with them to establish why they could not meet these requirements and whether there has been a recent or previous change of name that has not been declared.
For any questions relating to our DBS system call our Disclosure Helpline, Mon-Fri, 9am-5pm on 0303 003 1111.
Page last updated: 05 September 2025